
How to sequence a yoga class: a step-by-step guide
A good sequence feels inevitable to the people practicing it: every pose prepares the next, and nothing arrives too soon. Here is a framework you can use for any class, from a 20-minute morning flow to a 90-minute workshop.
1. Start with the people, not the poses
Before you open your pose list, answer three questions. They shape every choice that follows.
- Who is coming? Beginners, a mixed studio class, athletes, office workers, seniors, pregnant students. Their experience sets the ceiling for how complex the class can be.
- How long do you have? Not the class slot, but the time you can actually move. A 60-minute class often has 5 minutes of arrival and announcements.
- How should they feel when they leave? Energised, grounded, open, tired in a good way. This is your intention, and it is often more useful than a body part.
2. Choose a peak or a focus
Most well-sequenced classes are going somewhere. That destination can be a peak pose (crow, wheel, half moon), a body area (hips, side body, upper back) or a theme (grounding, balance, letting go). Once you know where you're going, you can work backwards and ask: what does the body need to arrive there safely?
For a peak pose, list its ingredients. Wheel pose (Urdhva Dhanurasana), for example, needs open hip flexors and quads, a mobile upper back, shoulders that can flex overhead, and strong legs and glutes. Every one of those ingredients becomes part of your build.
3. Map the arc of the class
Almost every style follows the same shape: arrive, warm up, build, peak, come down, rest. The proportions change by style, but the shape holds.
| Phase | Purpose | Share of a 60-min class |
|---|---|---|
| Centering | Arrive, breathe, set the intention | 3–5 min |
| Warm-up | Mobilise the spine and joints, raise body heat | 8–10 min |
| Sun salutations | Link breath and movement, build heat | 8–10 min |
| Standing & build | Strength and preparation for the peak | 12–15 min |
| Peak | The most demanding pose or sequence | 4–6 min |
| Floor & cool-down | Counterposes, forward folds, twists, hips | 8–10 min |
| Savasana | Rest and integration | 5–8 min |
A yin or restorative class flips the proportions: little or no build, long floor holds, and a longer rest. A power class shortens centering and cool-down and spends more time building heat. Decide the proportions first, then fill them.
4. Warm up what the peak will use
A warm-up is not generic. If the class builds toward a hip opener, your warm-up should already move the hips in several directions. Good warm-ups move the spine in all six directions (flexion, extension, both side bends, both twists) and then focus on the joints your peak depends on.
Cat and cow, gentle side bends in a seated position, low lunges and a few rounds of half sun salutations cover most classes. Keep holds short and breath-led here: one breath per movement is plenty.
5. Build in layers
The build is where sequencing skill shows. A useful rule is to introduce each ingredient of the peak simply first, then more deeply. For a twist peak, you might teach a seated twist, then a revolved low lunge, then revolved chair, then revolved triangle. Each pose asks a little more of the same action.
Group standing poses by the position of the hips. Moving from warrior II to triangle to side angle keeps the hips open to the side; moving from warrior I to pyramid to revolved triangle keeps them square. Switching between open and square hips repeatedly is tiring and confusing for students.
6. Follow the peak with counterposes
After intense work in one direction, bring the body back toward neutral. After backbends, use a gentle forward fold or a twist. After deep forward folds, a mild backbend like bridge or sphinx. After arm balances, release the wrists and shoulders. Counterposes don't need to be dramatic; their job is to neutralise, not to start a new effort.
7. Keep sides even
Any one-sided pose should be taught on both sides, with roughly the same hold. It sounds obvious, but it is the most common sequencing slip in live classes, especially in flows where the second side is taught from memory. Plan both sides explicitly, or plan the pose once with “both sides” and teach right then left.
8. Plan to the minute
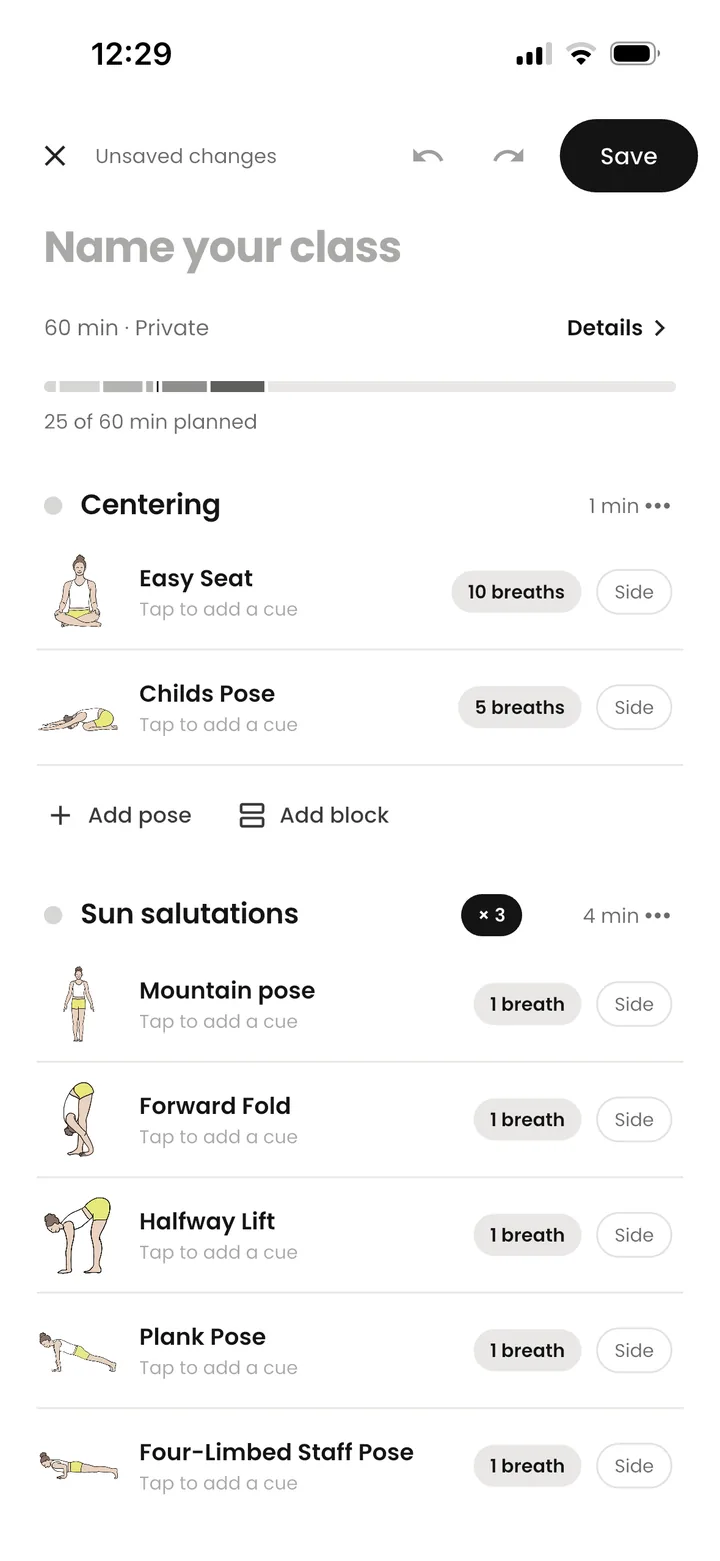
Running over is the second most common slip, and it is almost always savasana that gets cut. Add up your plan honestly:
- Count a breath as roughly 5 seconds for most students.
- Add 3–5 seconds of transition between poses, more for beginners.
- Double one-sided poses and multiply repeated rounds.
- Leave 10% spare for questions, props and the unexpected.
If your plan is long, shorten holds in the build before you cut the cool-down or rest.
9. Write the cues while you plan
A sequence is only as clear as the instructions that carry it. For each pose, write the one cue students most need: usually the foundation first (“press through the outer edge of the back foot”), then the action (“lengthen the side body”), then the breath. See our guide to writing cues students actually follow.
10. Teach it, then revise it
No sequence survives the first class unchanged. Afterwards, note what landed, where students struggled and how long it really took. Those notes are the difference between a plan and a class you can teach with confidence a second time.
A quick checklist
- Do I know who this class is for and how they should feel afterwards?
- Is there a clear peak or focus, and does the warm-up prepare it?
- Do the standing poses flow without constant hip changes?
- Is every intense direction followed by a counterpose?
- Are both sides planned with equal holds?
- Does the total fit, with savasana intact?